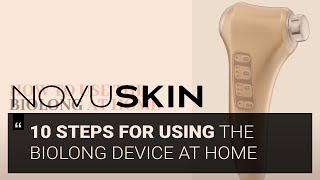
10 Steps for Using The BioLong Device at Home
10 Steps for Using The BioLong Device at Home
 We’ve broken down how to use your BioLong Device in 10 easy steps!
The following steps can be combined or used separately:
Positive Galvanic Ion (+): Steps 1-6 = Cleansing Method
Negative Galvanic Ion (-): Steps 7-8 = Anti-Aging Method
Photon: Steps 9-10 = LED Light Therapy
Step 1: Cleanse the face with a facial cleanser, then rinse off any remaining product.
Step 2: Set the device’s function to Positive Ions with Sonic. Make sure your hand has contact with the electrode at all times (the metal line along the backside of the handle).
Step 3: Set the Positive Ion (+) function and choose the intensity.
Press once – Low
Press twice – Medium
Press three times – High
Press four times – Switches off
Step 4: Using a wet cotton pad, make sure the area the device is touching is constantly wet. Use a wet cotton pad to dab the area as you go.
Step 5: Apply the device to the target areas. Motions will differ depending on the section of the face.
Step 6: Rinse the face with lukewarm water, then dry the skin thoroughly to remove remaining impurities.
Step 7: Apply product depending on the type of skin care routine (morning/night).
Step 8: Set the device’s function to Negative Ion (-) with Sonic, choose the intensity and repeat the same motions as before.
Step 9: Press the Photon function and choose the preferred LED light therapy setting.
Press once – Red Light Therapy: Anti-Aging Treatment
Press twice – Blue Light Therapy – Oily and Sensitive Skin Treatment
Press three times – Red & Blue Light Therapy: Problematic Skin Treatment
Step 10: Goggles may be applied for eye-protection, as well as products to help the device glide smoother. Repeat the same motions as before.
*Products that can be combined with the BioLong device:
Cleansing: Purifying & Balancing Facial Cleanser
Daytime Routine: Collagen Eye Serum, Intensive Repair Day Cream
Nighttime Routine: Eye Cream, Night Cream, Neck Serum